There are an abundance of static site generators available to users; choosing between them can seem overwhelming. Over my internet-inhabiting life, I've used Jekyll (remember Octopress?), Pelican, and a variety of less popular projects. Today, I believe eleventy is the best choice you can make for a greenfield static site project.
Why choose 11ty in 2021? #
There are a few reasons why 11ty is the best choice for a blog in 2021:
- It's built for node.js. Most developers already have node and npm installed, so it's likely you won't have to install anything new to use it. A particular advantage is that you won't have to install Ruby (required for Jekyll) just to build your website.
- It uses the extremely mature Nunjucks templating engine. If you've ever used jinja2 or the Django templating language, you'll feel right at home.
- The official eleventy starter projects are easy to customize and ruthlessly focused on performance.
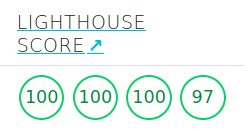 Wow! Look at those Lighthouse scores!
Getting started #
Start a stopwatch. This will actually only take 5 minutes.
Step 1. Make sure you have node.js and npm installed. #
You probably already have these. If not, instructions on installing them can be found here.
Step 2. Clone an 11ty starter project to your local machine and install the dependencies. #
I'm going to be using the eleventy-base-blog starter, but you can use whichever strikes your fancy.
git clone https://github.com/11ty/eleventy-base-blog myblog
cd myblog
npm install
Step 3. Build your site! #
npx eleventy --serveYou should see a successful build output and a link to view your site at http://localhost:8080.
Step 4. Configure your site to work with GitHub Pages #
We're going to forgo setting up a GitHub Action to automatically build your site on GitHub's servers. Since you'll be building your site locally during development anyways, it makes sense to simply push the built HTML. GitHub Pages only supports serving from the root of a branch or a subdirectory named docs, so we're going to tell eleventy to build there instead of _site.
First, make a directory for your build output
mkdir docsNext, open your .eleventy.js configuration file and change the output directory from _site to docs:
dir: {
      input: ".",
      includes: "_includes",
      data: "_data",
      output: "docs"
}
Finally, change the 404 path in the same file to reflect your new output folder as well:
eleventyConfig.setBrowserSyncConfig({
  callbacks: {
    ready: function(err, browserSync) {
      const content_404 = fs.readFileSync('docs/404.html');

      browserSync.addMiddleware("*", (req, res) => {
        // Provides the 404 content without redirect.
        res.write(content_404);
        res.end();
      });
    },
  },
  ui: false,
  ghostMode: false
});
Now you're ready to publish to GitHub!
Step 5. Push to GitHub and enable your site! #
Create a new GitHub repository, update your cloned repository to point to it, and push the contents of your site!
git remote remove origin
git remote add origin <your-newly-created-git-repo-url>
git push --set-upstream origin master
You should see your files appear in your repository on GitHub. Now, all that's left is to publish it! Click the Settings tab on your repository, and scroll down to the GitHub Pages section. Under Source, select the master branch and choose the docs folder as the project root:
 Your settings should look like this.
Hit "Save" and GitHub will publish your site. Congratulations, you've now got an eleventy blog running on GitHub Pages!
I hope that this tutorial was helpful, enjoy 11ty!